DISCLAIMER!
I do not take ANY responsibility for ANY issues you may encounter by following these steps. This is what I use for myself, and that’s what I’m sharing. This is NOT a general instruction for ANYONE to follow. If you decide to follow this instruction anyway, this is up to you.
PLEASE BE AWARE YOU MAY DAMAGE YOUR CAMERA BEYOND POSSIBILITY TO REPAIR IF YOU FAIL!
You have been warned. Don’t blame me.
My best advice for anyone that needs sensor cleaning, seek help at a professional camera workshop that has the right tools and dust-free environment for this kind of job.
Spotty images?
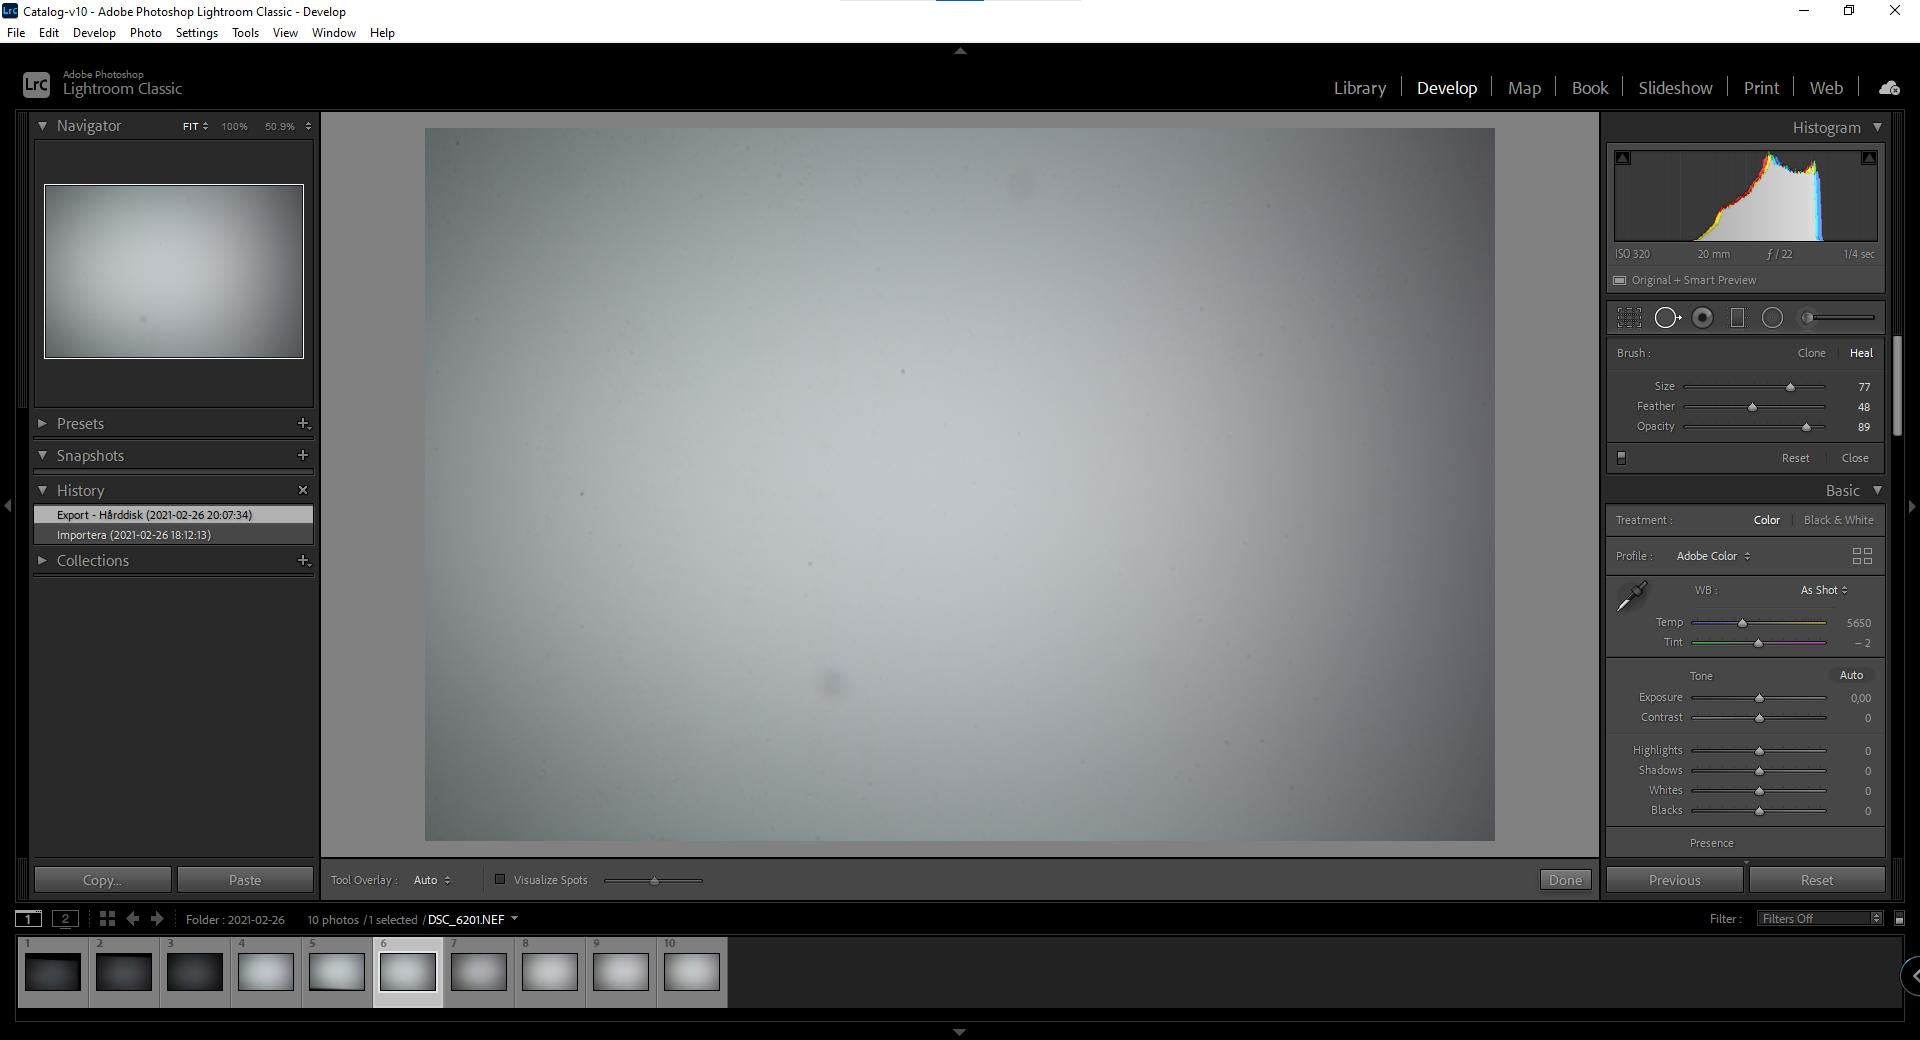
When taking shots on bright skies or white surfaces with small apertures you will surely find your images being spotty, especially if you’re changing lenses in non-clean environments which of course is the normal. If you have only a few stains or spots you might use the built-in spot removal tools found in for example Adobe Lightroom. But sooner or later you will find this being a tedious job and then it’s time for cleaning the sensor.
How do I know my images are full with spots? There’s an easy way to check this (assuming using MS Windows and Adobe Lightroom):
- Open Notepad, maximize to fill the entire computer screen
- Set your camera in single-shot manual mode, manual focus set to anything, set ISO to 100-400, set the aperture to smallest possible opening (highest f-value), and adjust the exposure time to make a correct exposure.
- Point the camera towards the screen so you fill the entire view
- While making a circular movement and making sure you still have the white screen in the view, press the exposure button
- Repeat step 4 a couple times, just to be sure you get a good image
- Import the photos to Lightroom, select the one with best and brightest exposure.
- Open the photo in Develop
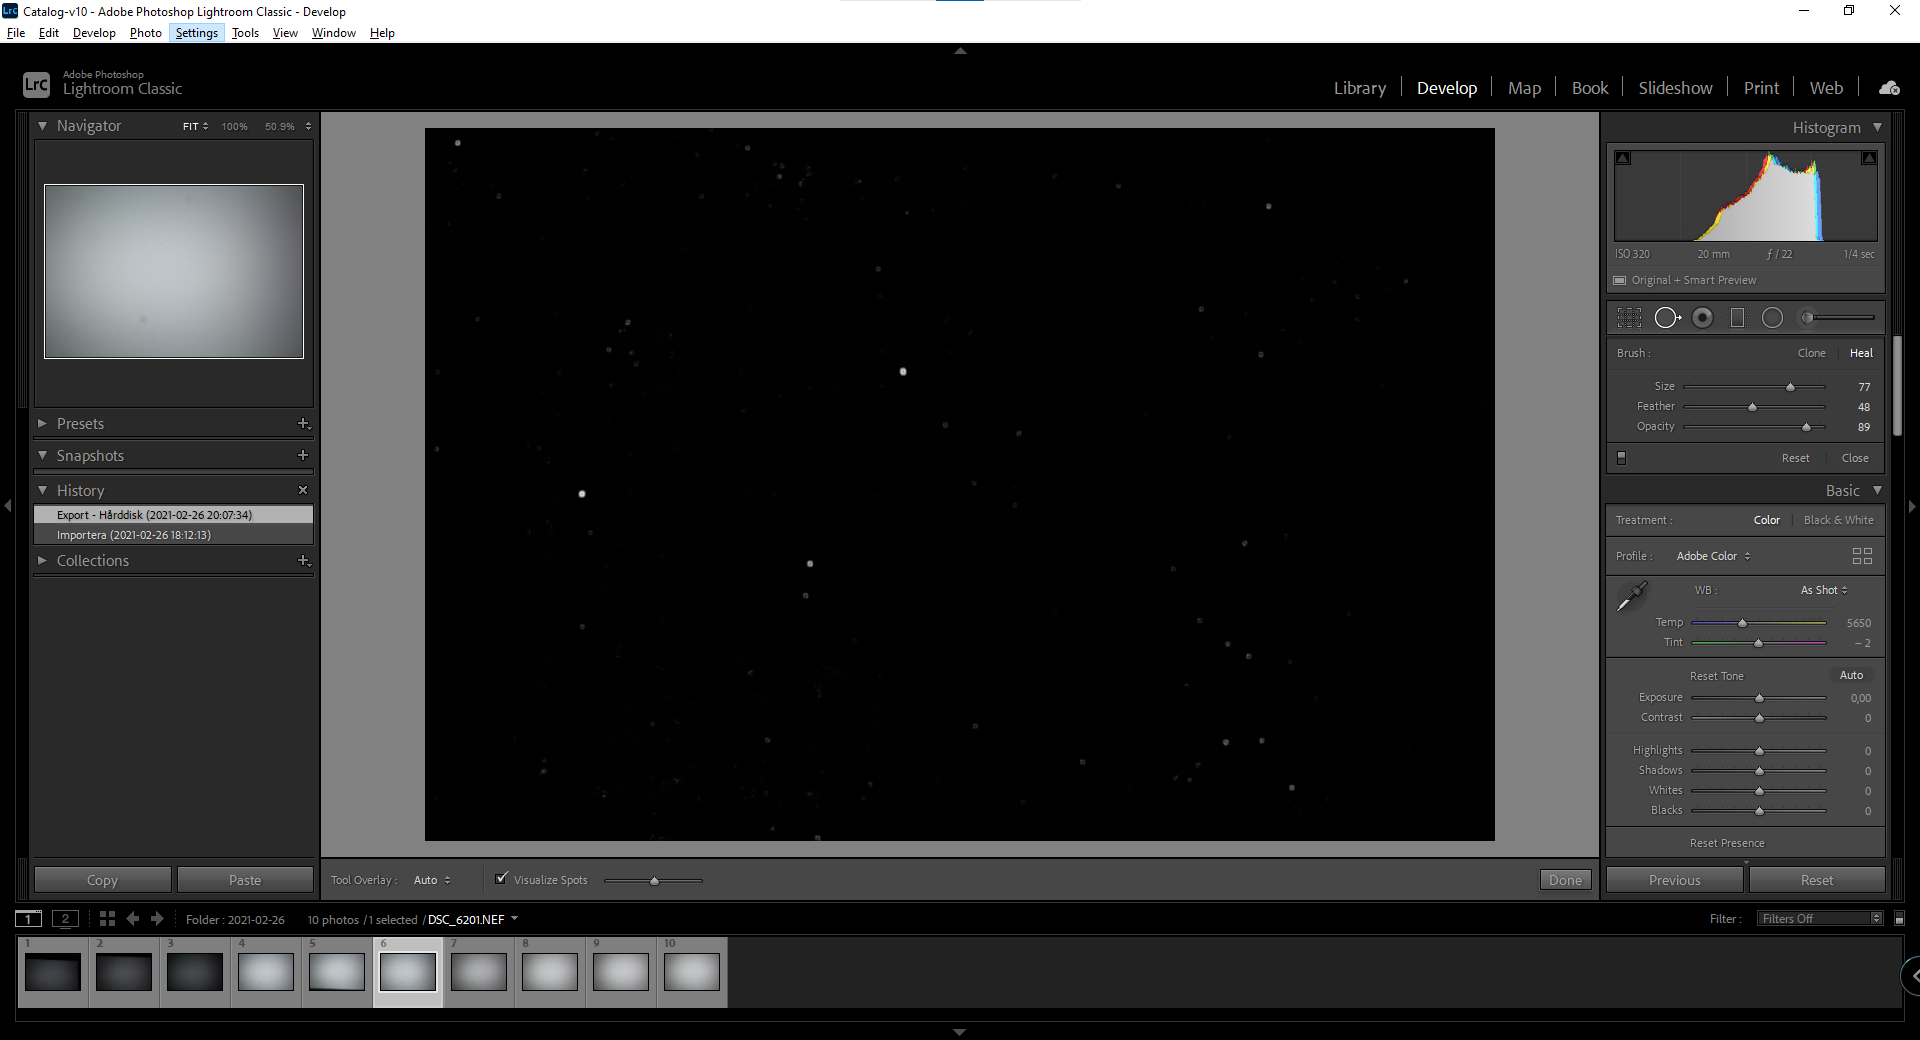
- Click on the spot removal tool, then select Visualize Spots beneath the picture. Voila, suddenly you realize your images are full with spots. As you also can see, the larger stains are not detected as spots. Those are likely dust or dirt on the lens front glass itself.
Time to clean
Preparations:
- a “dust-free” environment, at least as dust-free as you can get
- good work lighting
- no pets around (!)
- appropriate cleaning fluid and dust-free cleaning pads for your camera sensor type and size. I usually buy these stuff on Amazon.
- microfiber cloth for cleaning lenses
- dust/air blower for blowing off loose dust
- Put your camera in sensor cleaning mode (usually by selecting a menu option to flip the mirror so the sensor becomes accessible)
- Remove the lens, keep the camera with lens mount downwards
- Use to air blower to gently blow air puffs against the sensor, without any part of the blower touching the sensor!
- Put the camera with it’s back down, with the lense mount up
- Take a cleaning pad, open the seal and extract it. Put 1-2 drops of sensor cleaning fluid on each side of the pad.
- Align the pad to one short side of the sensor, lean the pad 30 degrees and firmly sweep it to the other side. Without lifting it up, lean the pad 30 degrees in the other direction and firmly sweep it back to it’s starting position.
- Visually inspect for any visible dust or stain remains on the sensor. If so, repeat step 13 using a new pad (!).
- Put the lense back on the camera.
- Switch off power.
Check the result
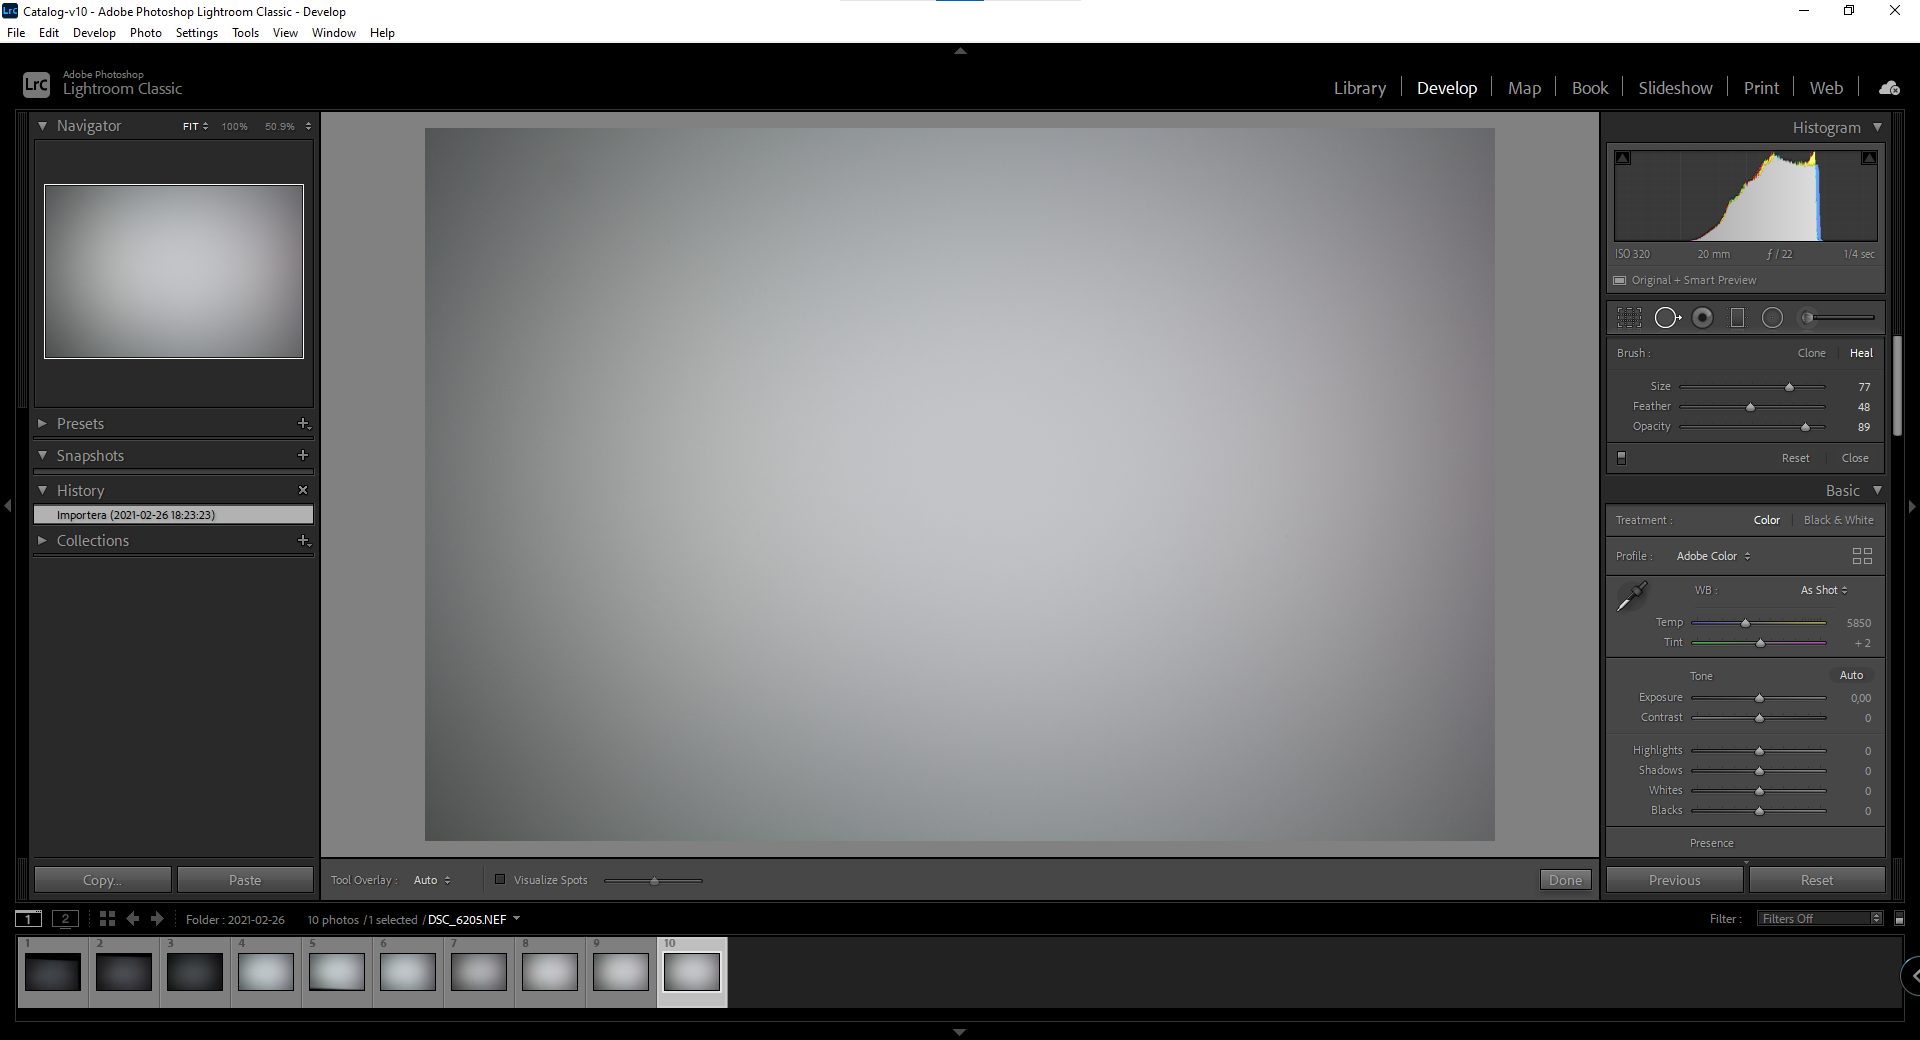
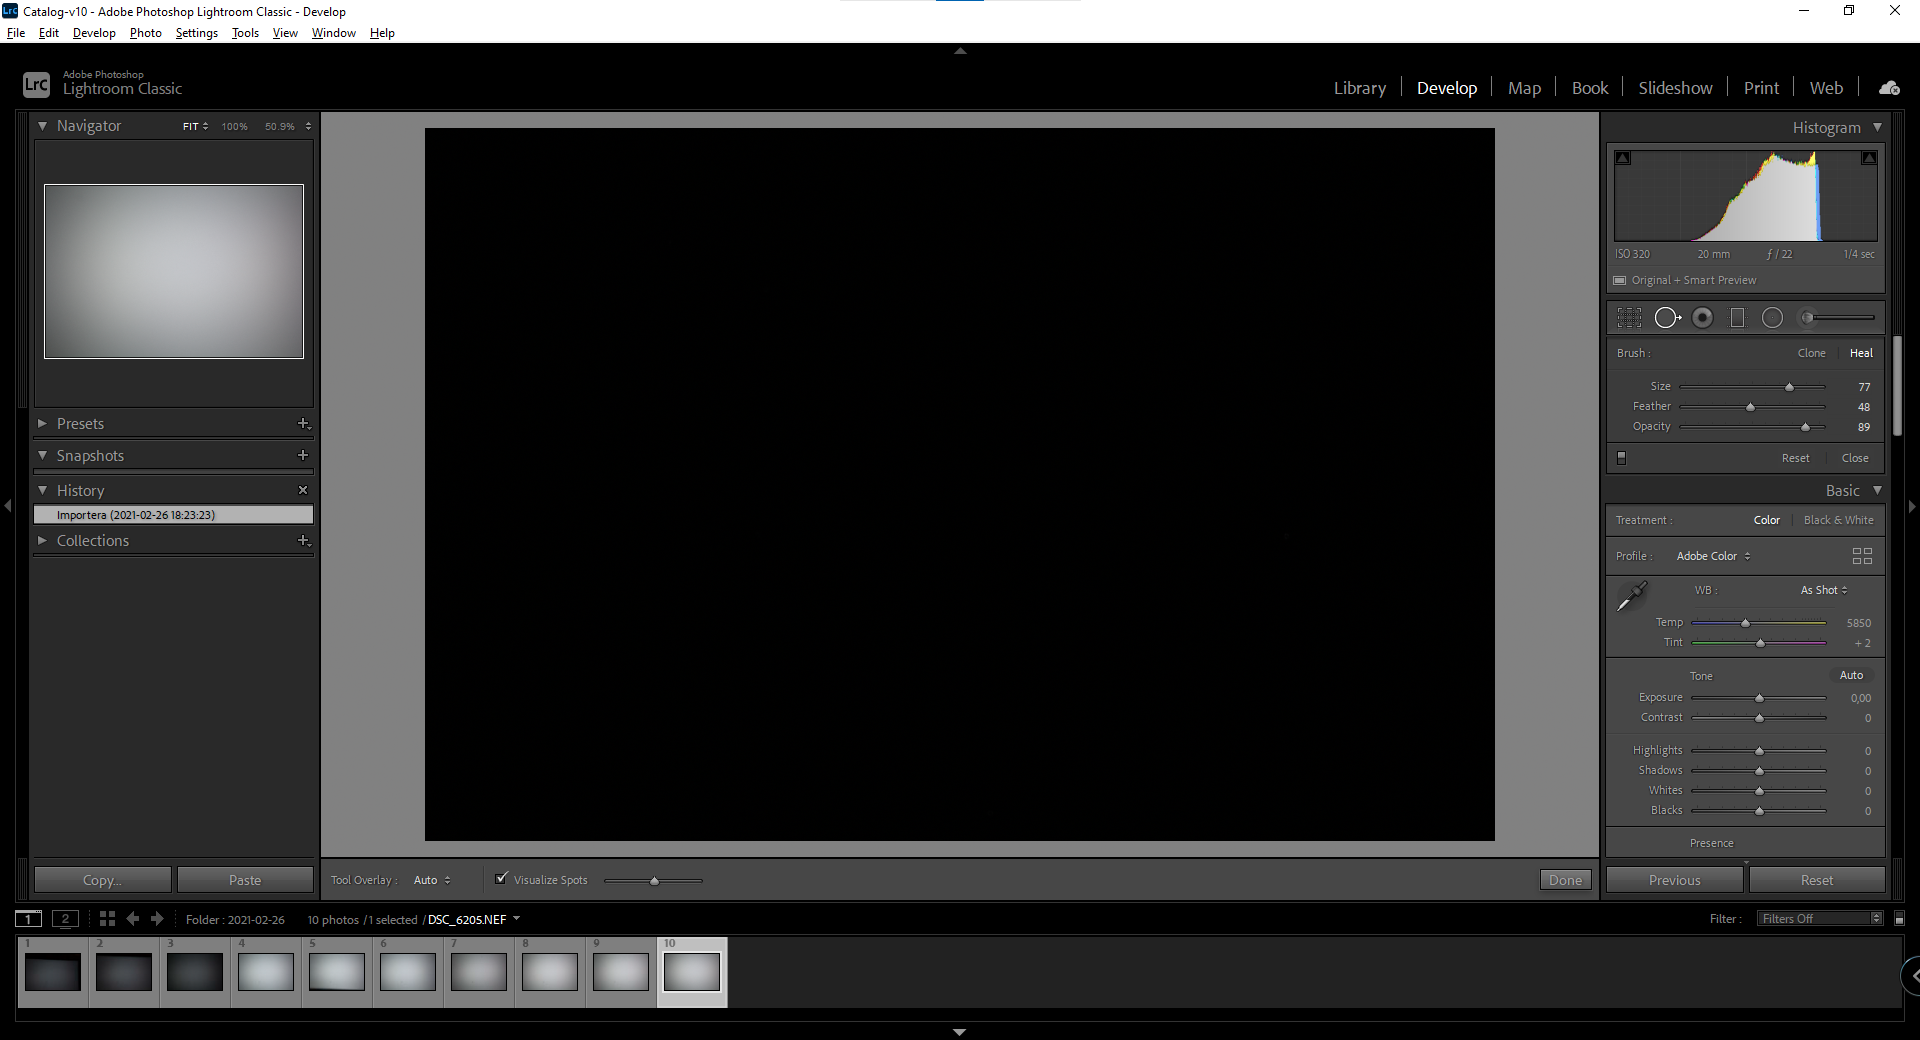
- Go to step 2 and take a couple more photos and check the result. If you did a good job, this is what you should get:
- If you still see larger stains, you should cleaning the lens front glass as well. Put one or two drops of sensor cleaning fluid on the glass and use the microfiber cloth to clean.
- Repeat all above until you’re satisfied.